How to record audio from screen readers
This project captures the audio output from several screen readers. The process to capture each recording is a bit of a challenge as it requires different operating systems and platforms. You can capture these recordings in many ways. Here is one workflow.
Software
- Audacity - multi-track audio editor and recorder
- VirtualBox - virtualization platform that can run Microsoft Windows as a virtual machine on macOS
- NVDA - screen reader for Windows
- JAWS - screen reader for Windows that provides speech and Braille output for computer applications
- Soundflower - record system audio output directly without sending it into the air to record
- QuickTime - play and record audio and video files on macOS
Hardware and platforms
- Macbook (macOS 10.15 and Windows 8.1 using VirtualBox) - while setting up Windows in VirtualBox is beyond the scope of these notes, be sure that audio from Windows is playing properly
- iPhone (iOS 13) - using the built-in screen recording function of iOS handles the capture on the iPhone
Configure macOS to pass audio to an application
These steps will show you how to use Soundflower to pass audio to QuickTime to create a recording.
Start by following the installation instructions from these (now several years old) Soundflower release notes:
- Download and install the signed Soundflower 2.0b2 installer
- Start playing music through the built-in audio
- Open Applications > Utilities > Audio MIDI Setup
- Click ‘+’ to add a new ‘Create Multi Output Device’
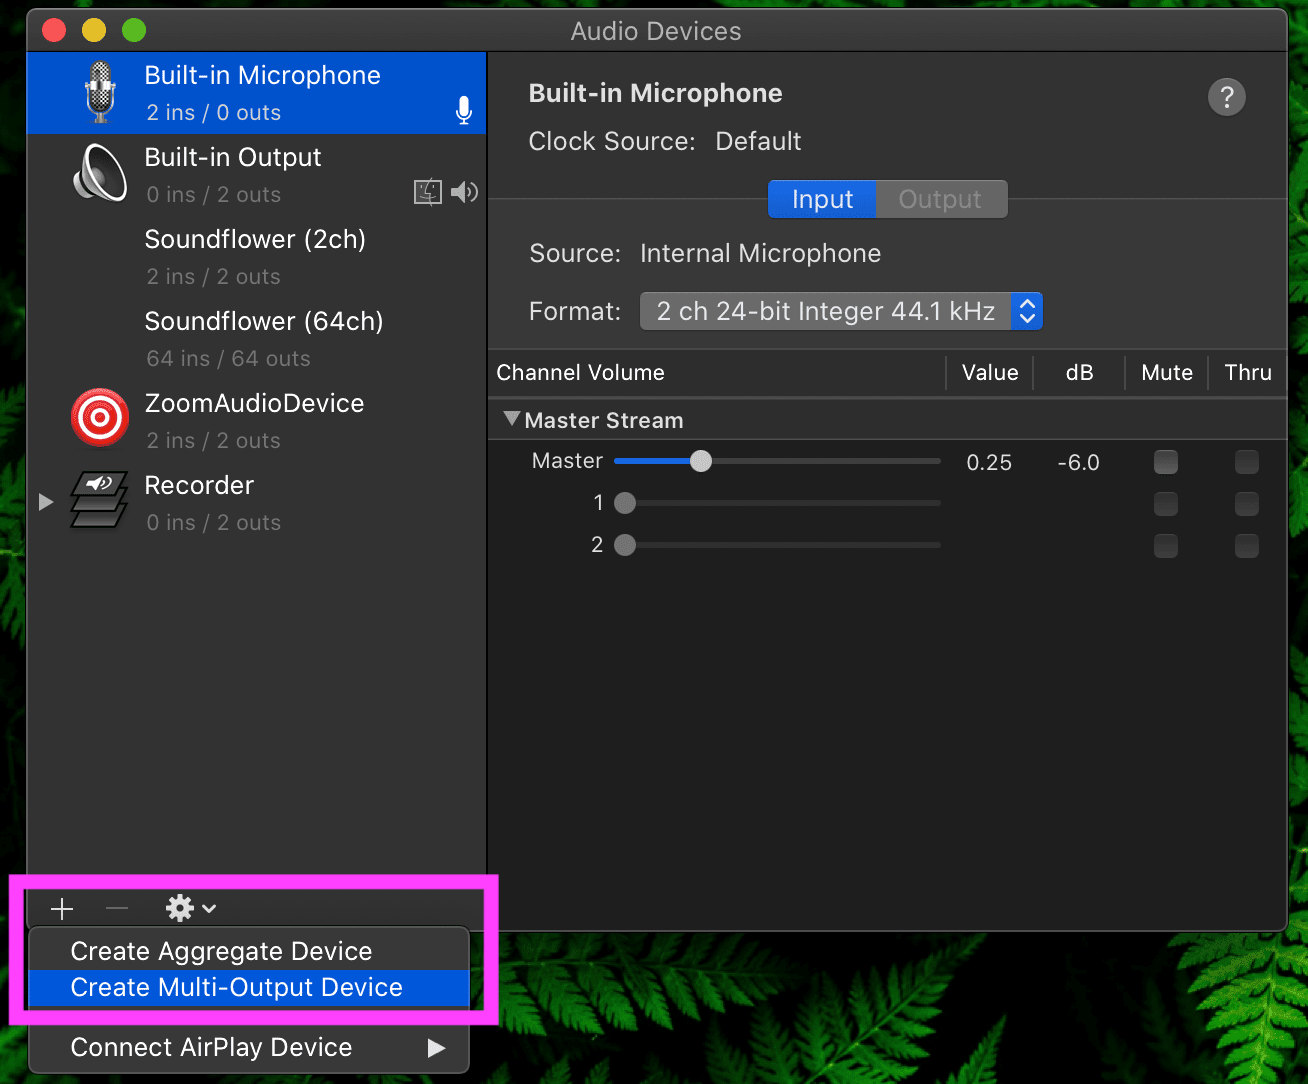
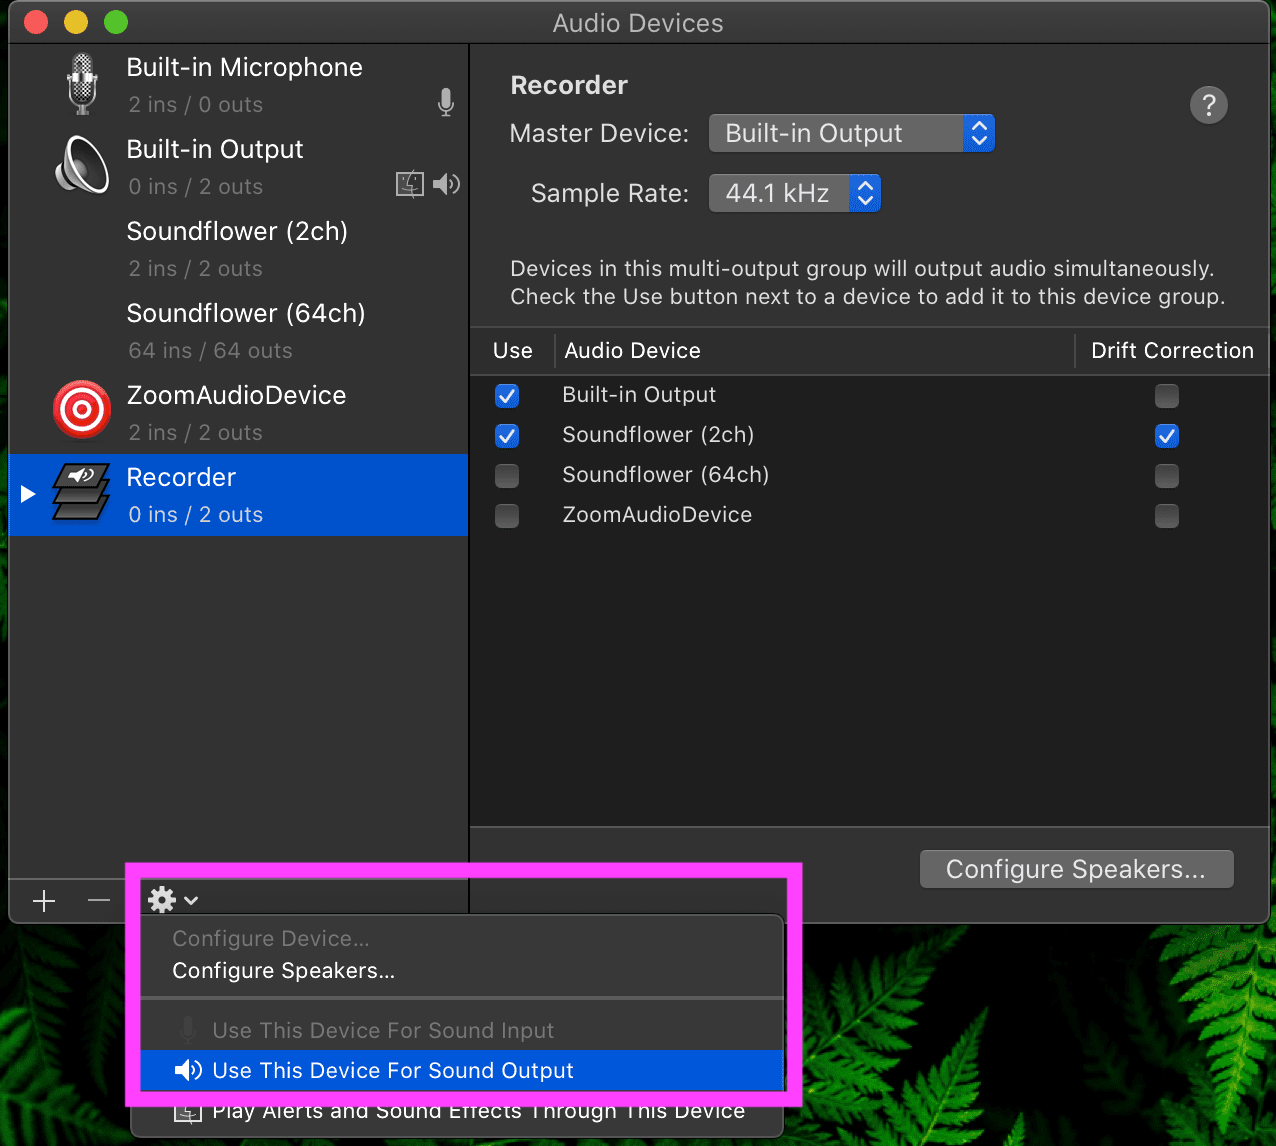
- Select both “Soundflower 2ch” and “Built-in Output”
- Click gear button and select “use this device for sound output”
The music you started playing in step 2 should continue to play. Now the audio is going to your built-in audio and is being passed to Soundflower for recording elsewhere. With the music continuing to play:
- Open up QuickTime
- File > New Audio Recording
- Click the down arrow (next to record button) and choose “Soundflower (2ch)” as the input
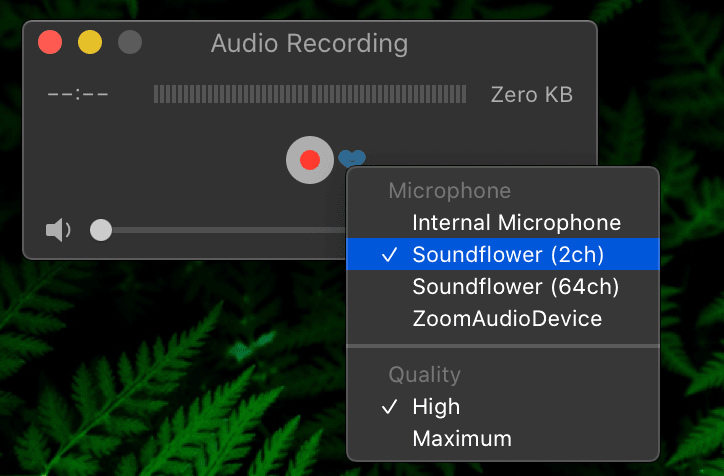
- You should now see audio levels changing
- Press record to capture the music output
- Play back the recording for confirmation
Record audio from screen readers with Audacity
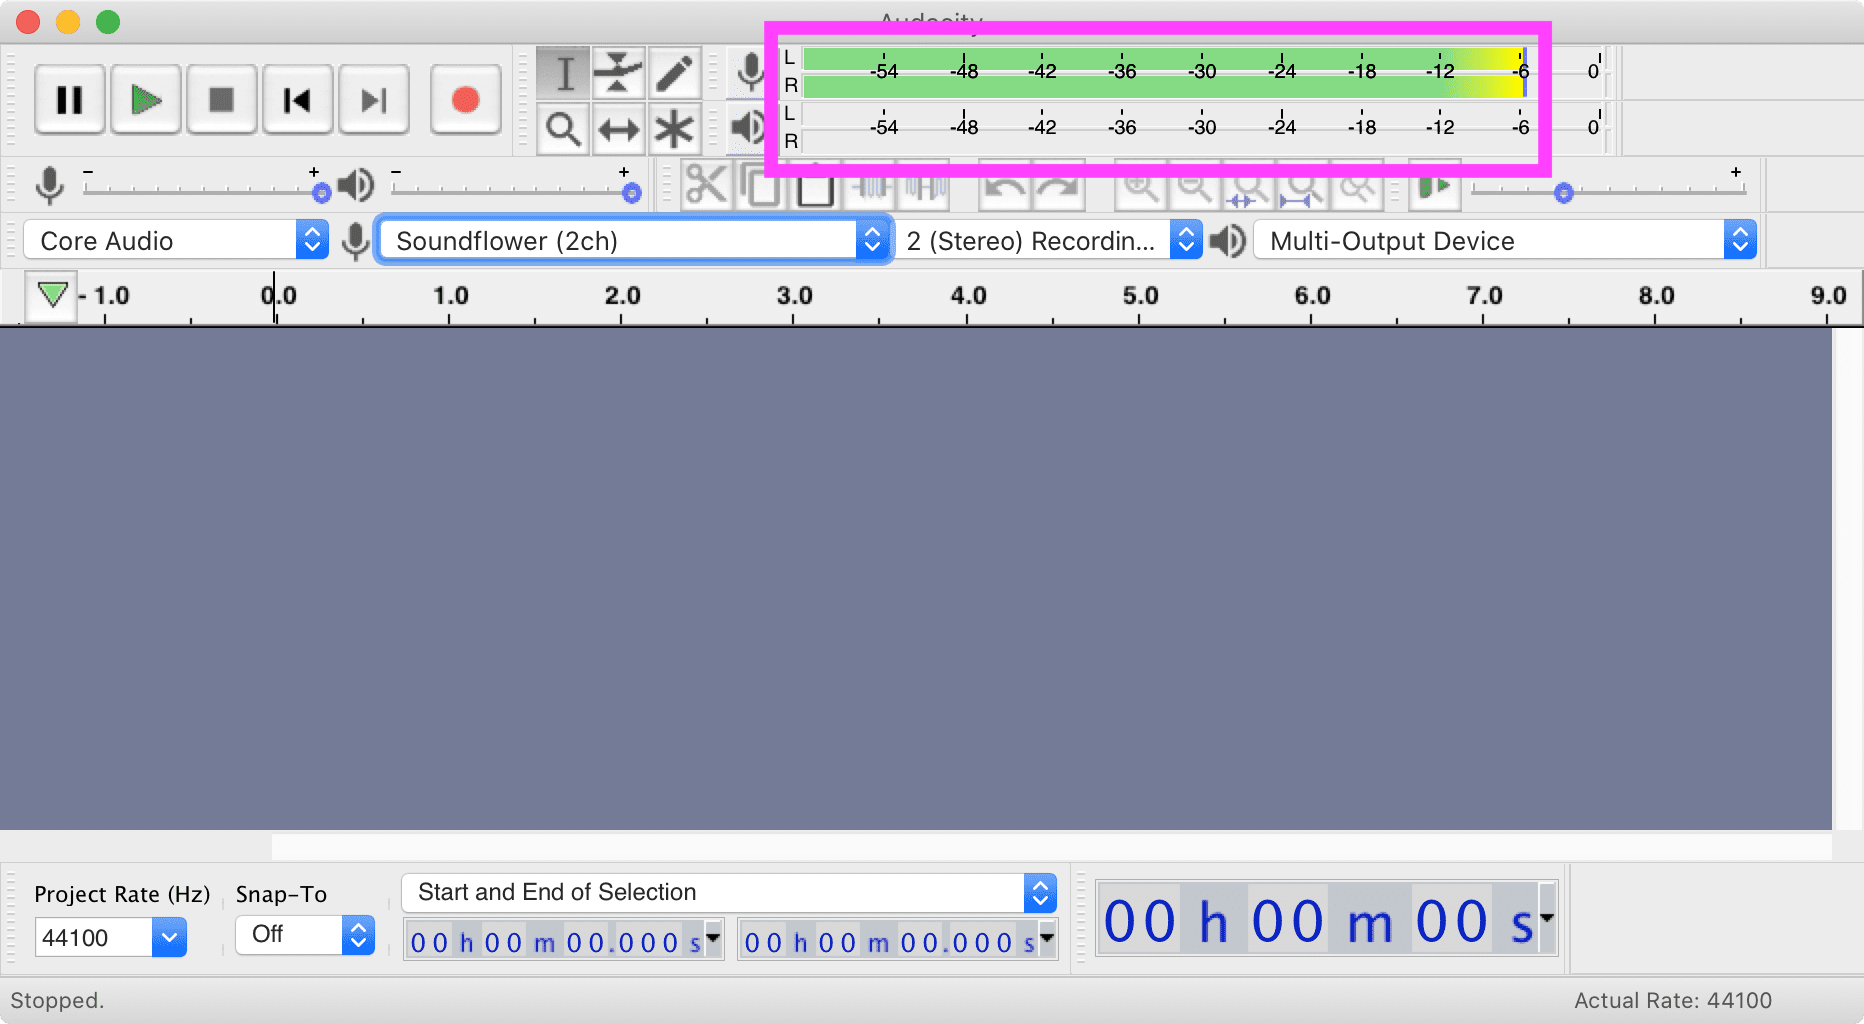
For heavier recording and editing capabilities, use Audacity. After confirming a working internal audio recording setup, install and launch Audacity. Choose Soundflower (2ch) as the microphone and your new Multi-Output Device as your speaker.
With audio playing, hit “Click to Start Monitoring” in Audacity. The visualizer should start to move.
Record VoiceOver on macOS
- Begin recording in Audacity
- Press ⌘ + F5 to start VoiceOver
- Use VoiceOver to navigate
- When finished, stop the recording in Audacity
- Press ⌘ + F5 to stop VoiceOver
Record NVDA and JAWS on macOS
- Open VirtualBox and launch Windows
- Install NVDA (free) and install JAWS (40-minute demo mode) in Windows
- Open NVDA or JAWS in Windows
- Open Audacity on macOS
- Confirm audio output from NVDA or JAWS is reflected in Audacity
- Record the audio as you navigate
Record VoiceOver on iOS
- General > Control Center > Add Screen Recording
- Pull down Control Center > Start recording
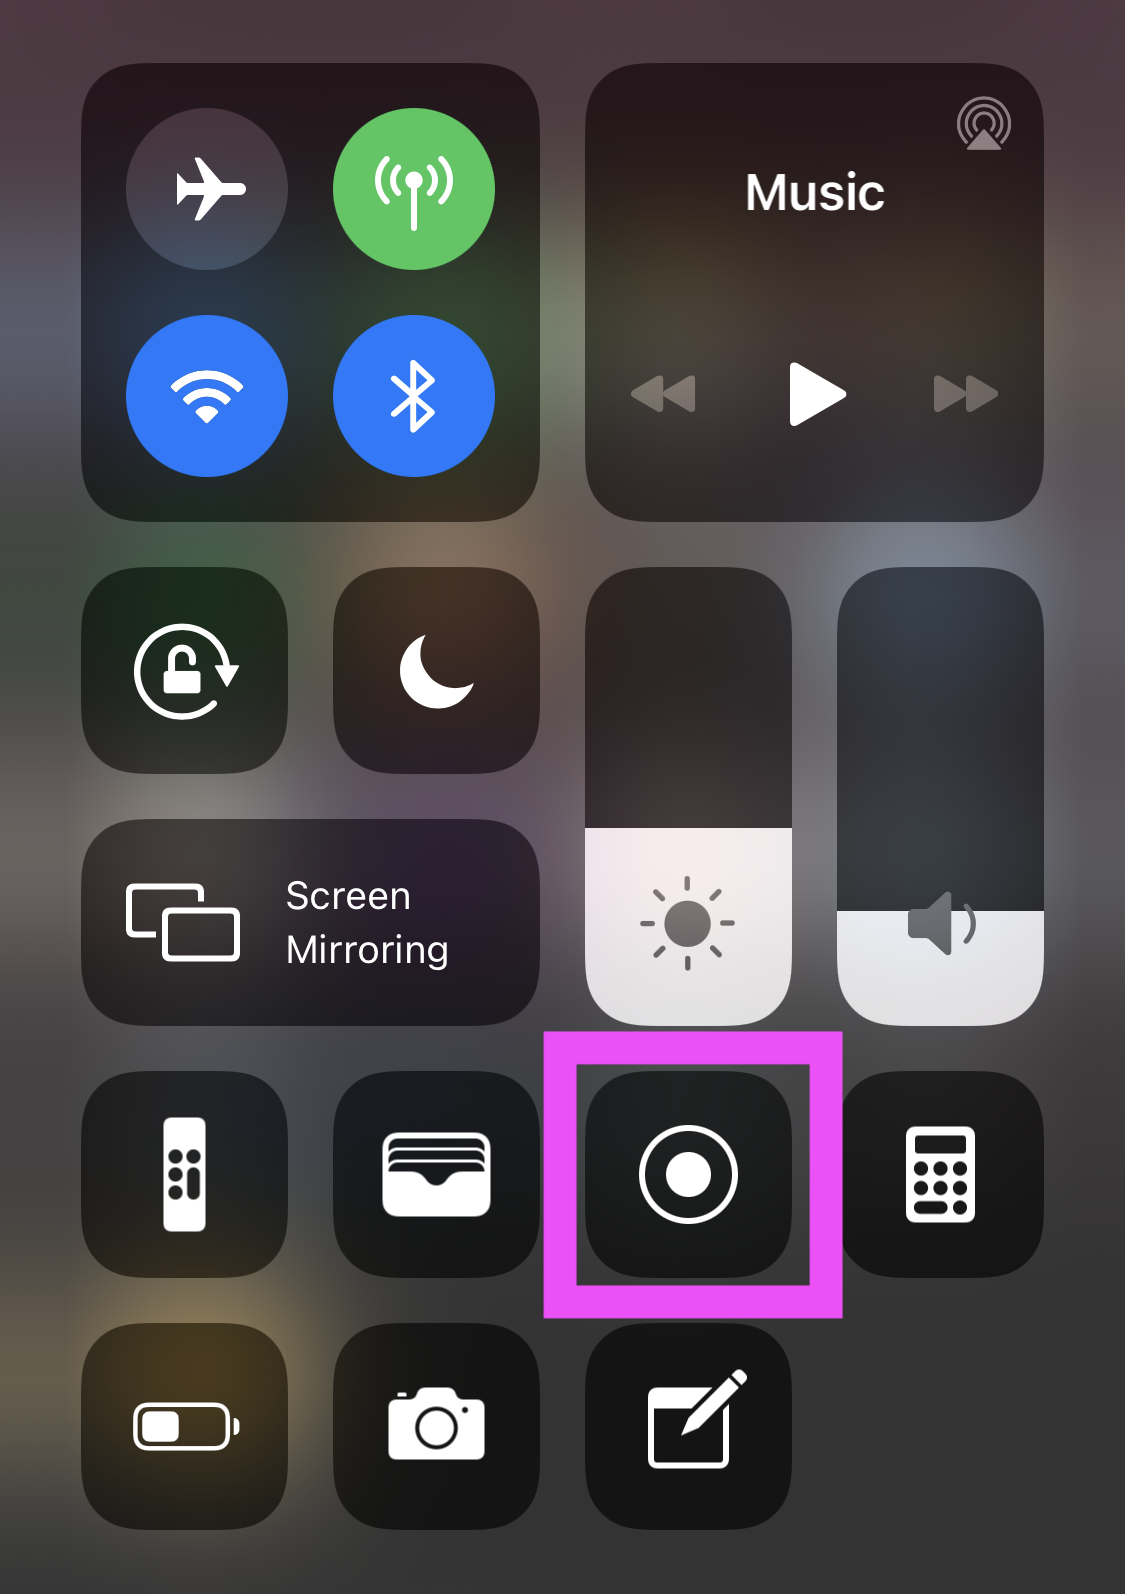
- General > Accessibility > VoiceOver > turn On
- The screen recording will capture as you navigate
- Stop the screen recording when finished
- Move MP4 screen recording to macOS for editing
For quick editing you can re-record the audio using Audacity while playing back portions of the screen recording in QuickTime. Converting the MP4 screen recording to MP3 is doable, too.
Editing
Using Audacity, open the full screen reader recording and begin to add labels, using ⌘ + B. Marking and labeling the audio file makes the clip export process easier to manage.
With a marked audio timeline, highlight the section of the timeline to export. To export the highlighted audio: Export > Export Selected Audio > Save as MP3